Gluten Free Never Tasted So Good!

Hello, I am Julie Donaldson and I am a clinical nutritionist with functional health training. I specialize in restoring balance in complex, chronic and acute health conditions. I welcome you to peruse other articles that may be of interest to you in your health investigation!
“I feel like I hit the jackpot when I found Julie! - a practitioner with more knowledge and experience than anyone I know of, and she’s a ‘foodie’ too! She’s given me recipes that fit my needs and are just delicious. Dive in! feet first!”
“We’ve come a long way, baby” in the gluten free world! What once felt like a barren wasteland of tasteless underperformers in gluten free foods is now an interesting field of offerings. Let’s dive into a couple of delicious and simple base recipes to which you can add endless toppings to satisfy your pleasures and your nutritional needs. Holistic health can include simple treats like these. I’ve got a quick and easy gluten free gnocchi recipe and a pizza dough recipe that will knock your socks off!

Gnocci dough
Gnocchi
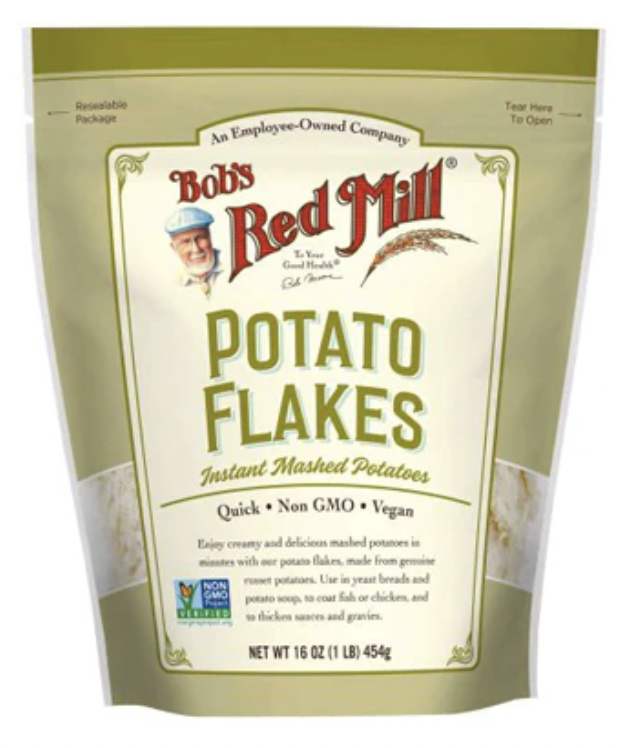
You’ll be so surprised at how easy it is to create this delicious little pasta treat. Start with products from Bob’s Red Mill - Potato Flakes and Gluten Free 1 to 1 Baking Flour. The final product is a fabulous soft texture and no one can tell that it’s gluten free!

Ingredients:
2 cups potato flakes
1 cup flour
2 tsp salt
1 1/2 cups water
1 egg
Whisk together the water and egg in a mixing bowl. Add the dry ingredients and stir until well combined. Place some extra of the gluten free flour on the counter and on your hands. Form the dough into a ball and knead until it is soft and no longer sticky to the touch. Divide the dough into 6 sections. Roll out one section at a time into a log about 3/4” thick. Cut into pieces about 3/4” long. (You may freeze sections you do not need to use immediately, then thaw, roll out and cut. Each section will make about 12 gnocchi.) Take each end and fold it towards the other, then score with a fork to make the standard-looking gnocchi (but you may shape it any way you like!).
Place in boiling water with some salt and cook for about 4 minutes until tender. Drain in a colander, reheat with a clean fat of your choice and combine with foods your body loves!
Pizza Dough
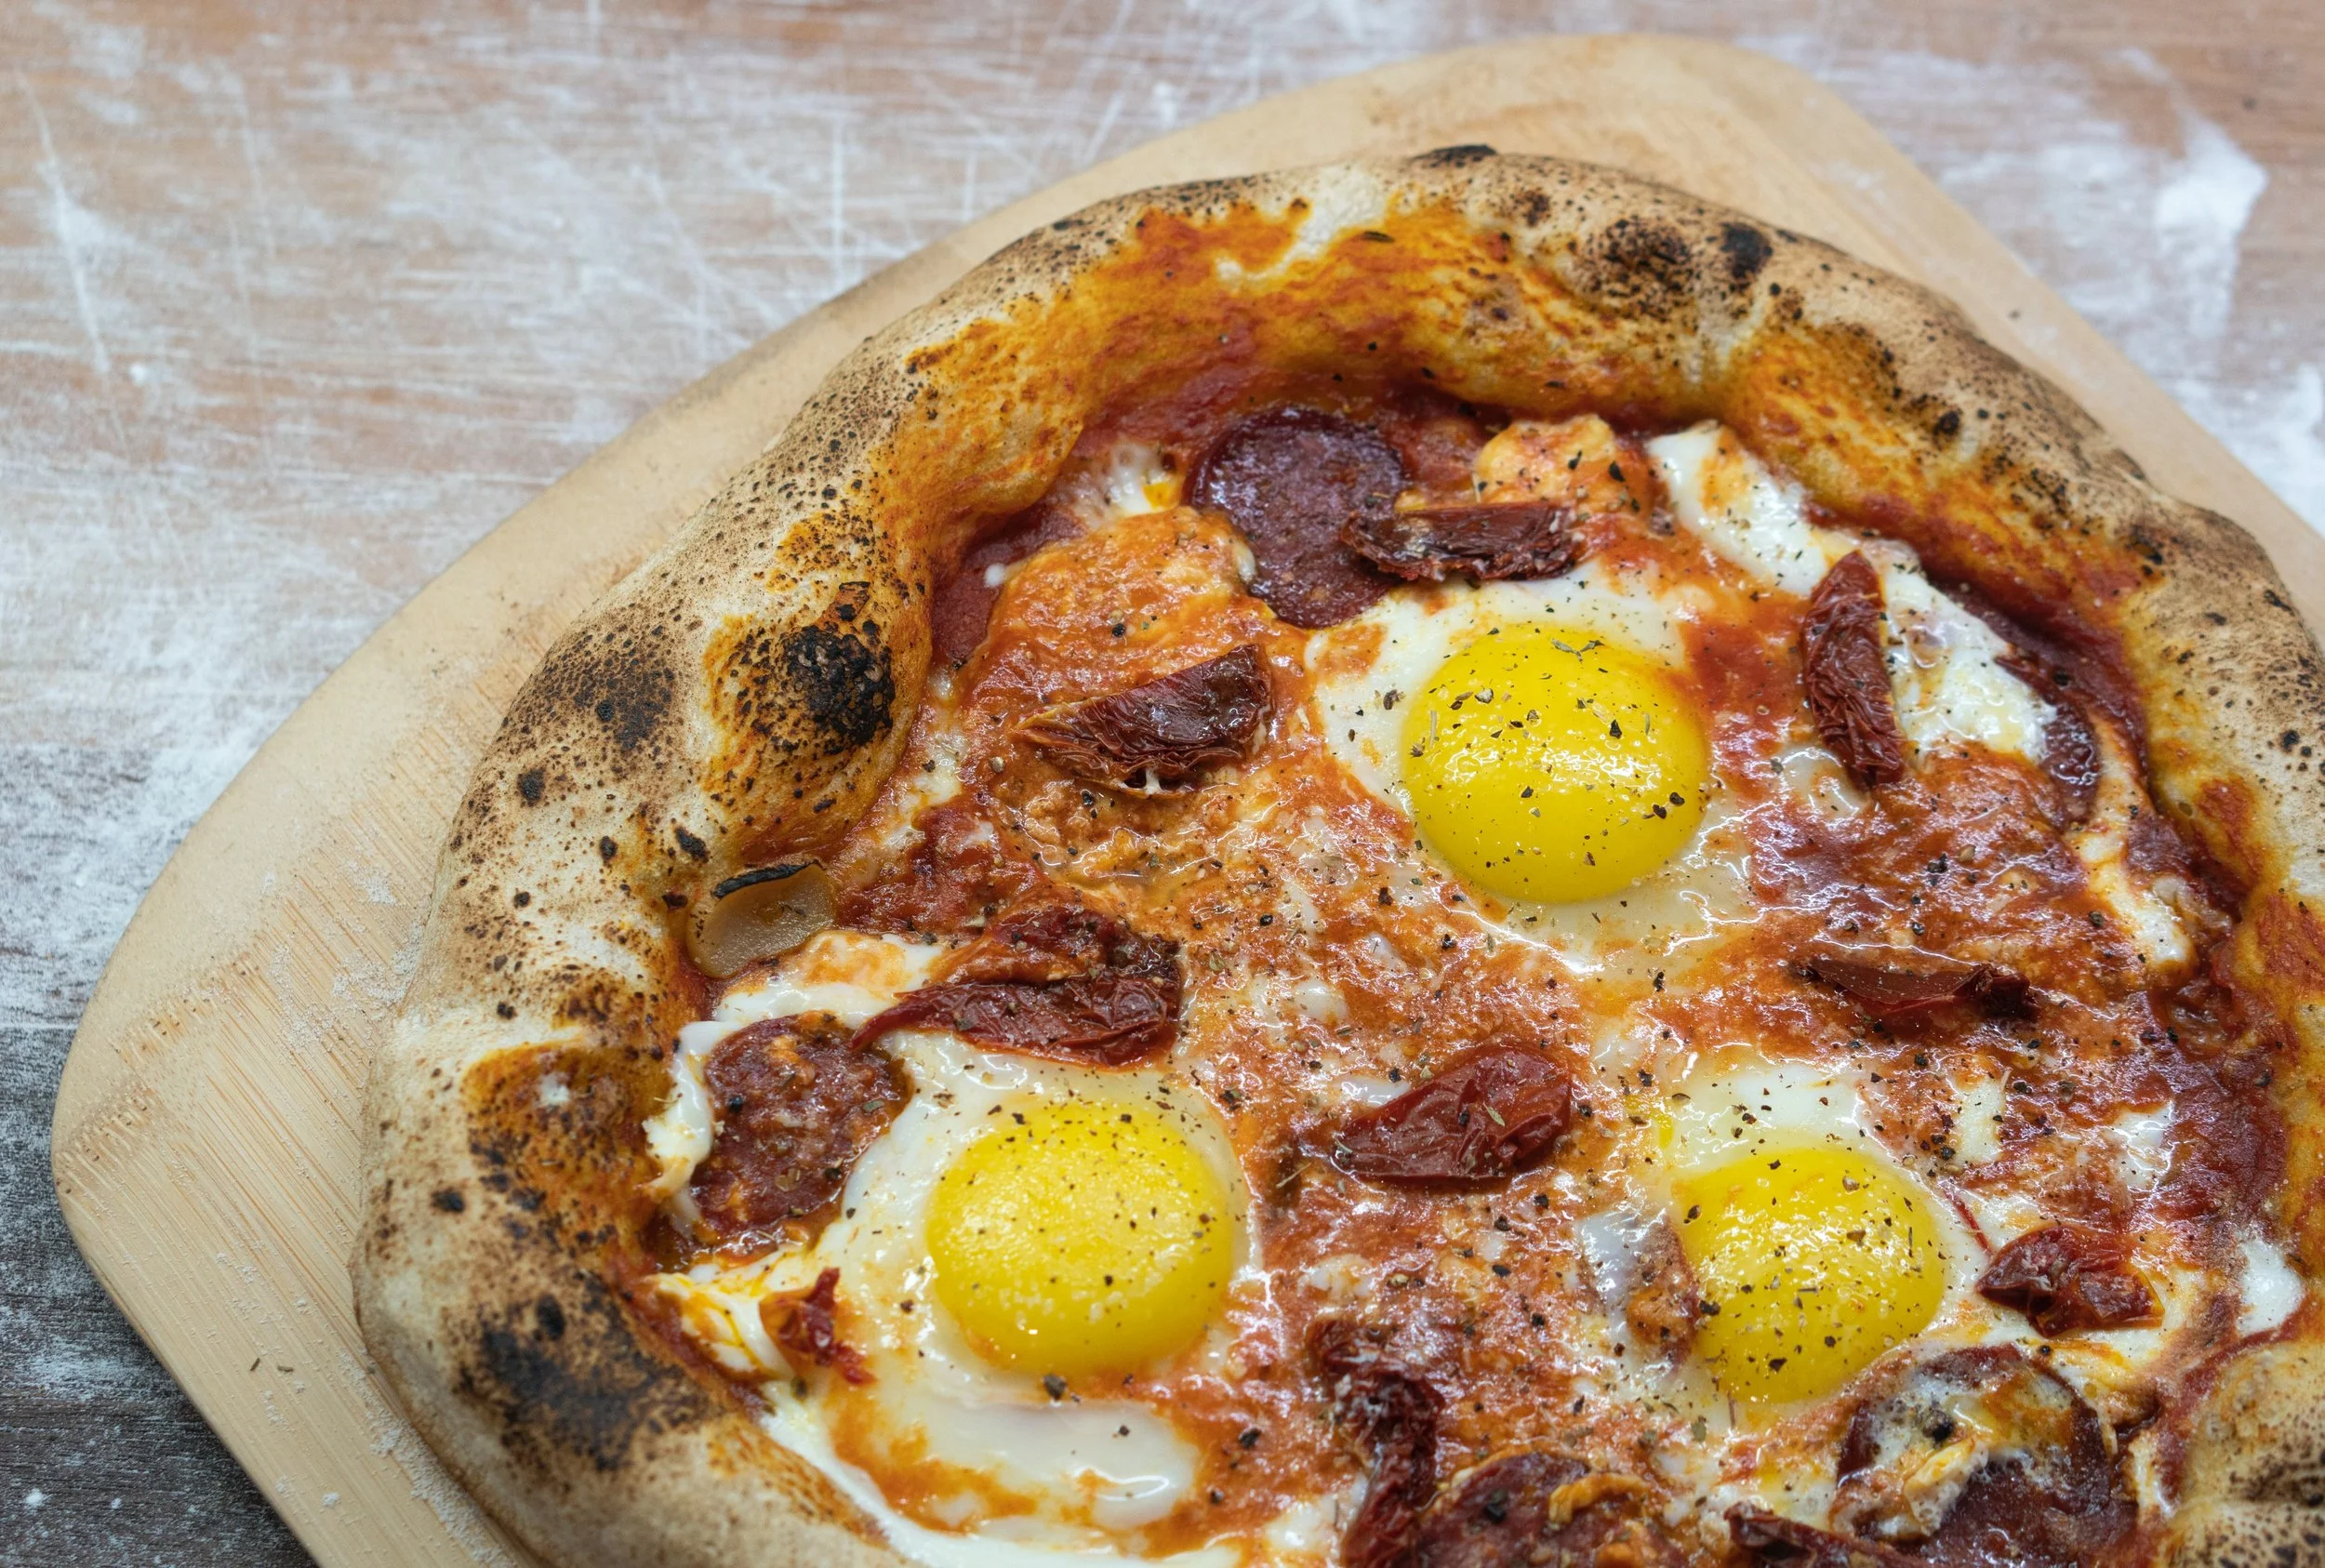
While pizza dough takes a few more steps than the gnocchi, it’s well worth it for any pizza lover! This recipe is credited to Laura Strange with My Gluten Free Guide. It begins with an incredible gluten free flour called Caputo Fioreglut which I found in an extended Google search for a better gluten free flour. It comes from Italy and it’s actually a wheat product with the gluten removed…it is safe for celiacs but not for those with a wheat allergy. It makes an incredible crust, just like what you’re used to with regular wheat flour - it crisps and it creates air pockets and tastes simply delicious. You can source it online and in some specialty food markets.

Pizza dough with Fioreglut flour
Ingredients:
(Note: I agree with most bakers that it’s best to measure in grams for baking because it’s more accurate so I’ll give you those measures but also the standard American measures)
6 grams dry yeast (.4 Tbs)
1 tsp. sugar
2/3 cup warm water
1 1/2 Tbs olive oil
1 1/2 tsp fine salt
200 grams Fioreglut flour (1 1/8 cups)
Mix the yeast and sugar together and add the warm water. (Be sure it’s not too hot as it will kill the yeast). Set aside for 10-15 minutes until a foamy head has formed.
In a bowl, mix the flour with the salt until combined, then add the olive oil and the liquid. You can use a wooden spoon, a food processor with dough blade or a mixer and dough blade. Place some extra of the flour on the counter and your hands and knead briefly until the dough is just slightly sticky. Place it in a container with a small amount of the flour or fine cornmeal, cover and refrigerate for 2-5 hours. This cold- proving slows down the yeast for the 1st rise.

Approximately one hour before you will make your pizza, remove the dough from the refrigerator. Depending upon your preference for thickness, at this point you may split the dough into 2 balls to make 2 thin crusts if you like, or keep it all for one crust. Leave it covered at room temperature for the 2nd rise. When it’s risen and ready, flour your surface again and roll it out for cooking.
After some trial and error, I decided that investing in a small pizza oven was well worth it! The pizza cooks very fast and evenly across all areas. If this is not an option for you, place the dough in a heavy pan and cook it at 450 degrees for about 8 minutes, then put your toppings on and finish the cooking process. (Pizza’s not just reserved for dinner, you know! A delicious breakfast pizza is a special weekend treat.)
I purchased the Hammacher Schlemmer Italian Countertop Pizza Oven. It retails for $149, heats up to 750 degrees and for an inexpensive option…simply put….it gets the job done beautifully! (I have plans for a friend who does masonry to build a wood-fired brick oven, but for now, this little device is delivering incredible pizza. It cooks in about 5 minutes.)
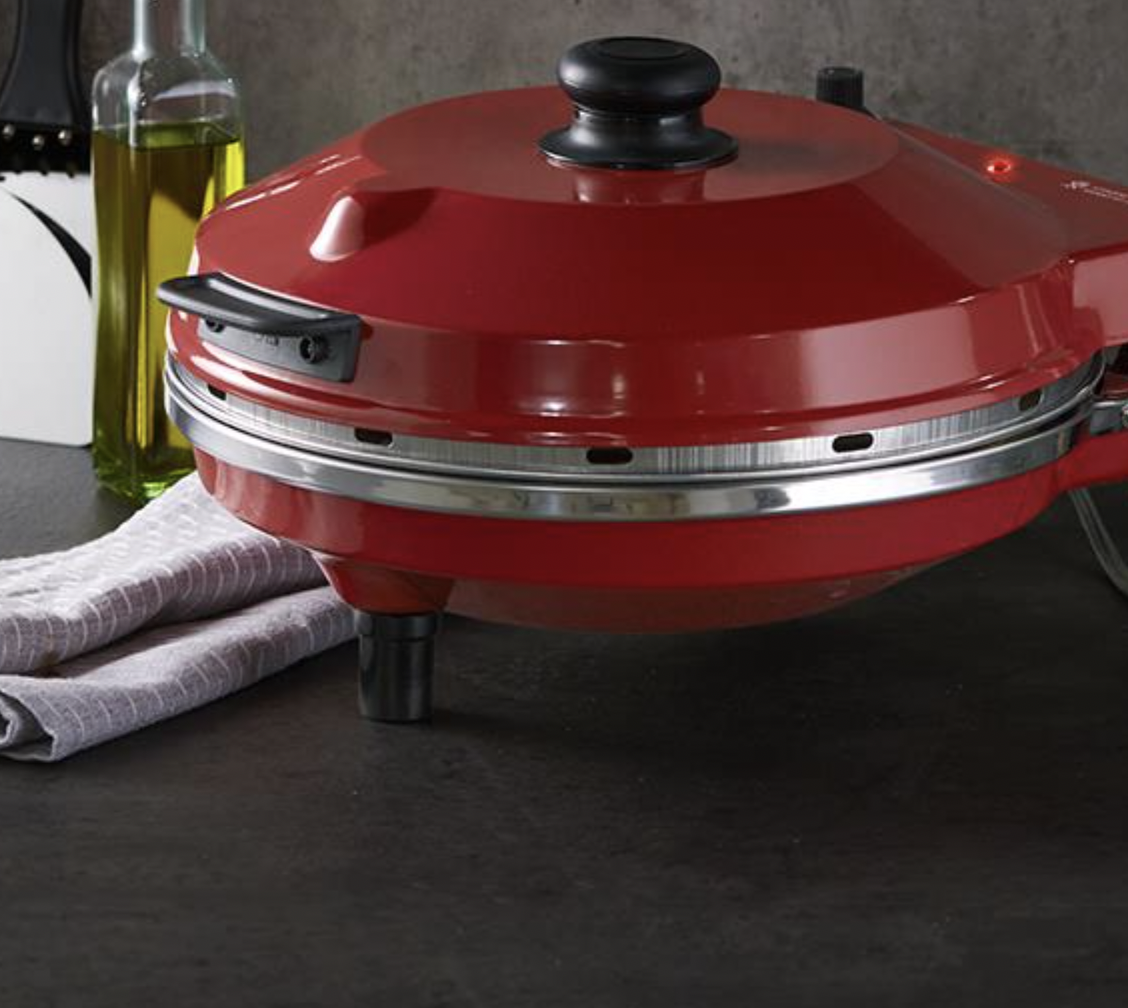
Italian countertop pizza oven
Happy cooking! And if you’d like to know what to put on your gnocchi and pizza to fit your metabolic needs, let’s define your Metabolic Type® and create some delicious recipes for you! All types can enjoy some amount of these delicious foods - investing in the personalizing of health care and nutrition is the best investment a person can make. Email me today at Julie@truenaturehealthconsulting.com. We provide holistic telehealth services.